How we do it
A vase begins as a line drawn on paper. Then code, clay, fire. Each step adds something, loses something. The kiln has the last word.
We start with pencil. Dozens of sketches. Most go in the drawer. One or two become proposals.
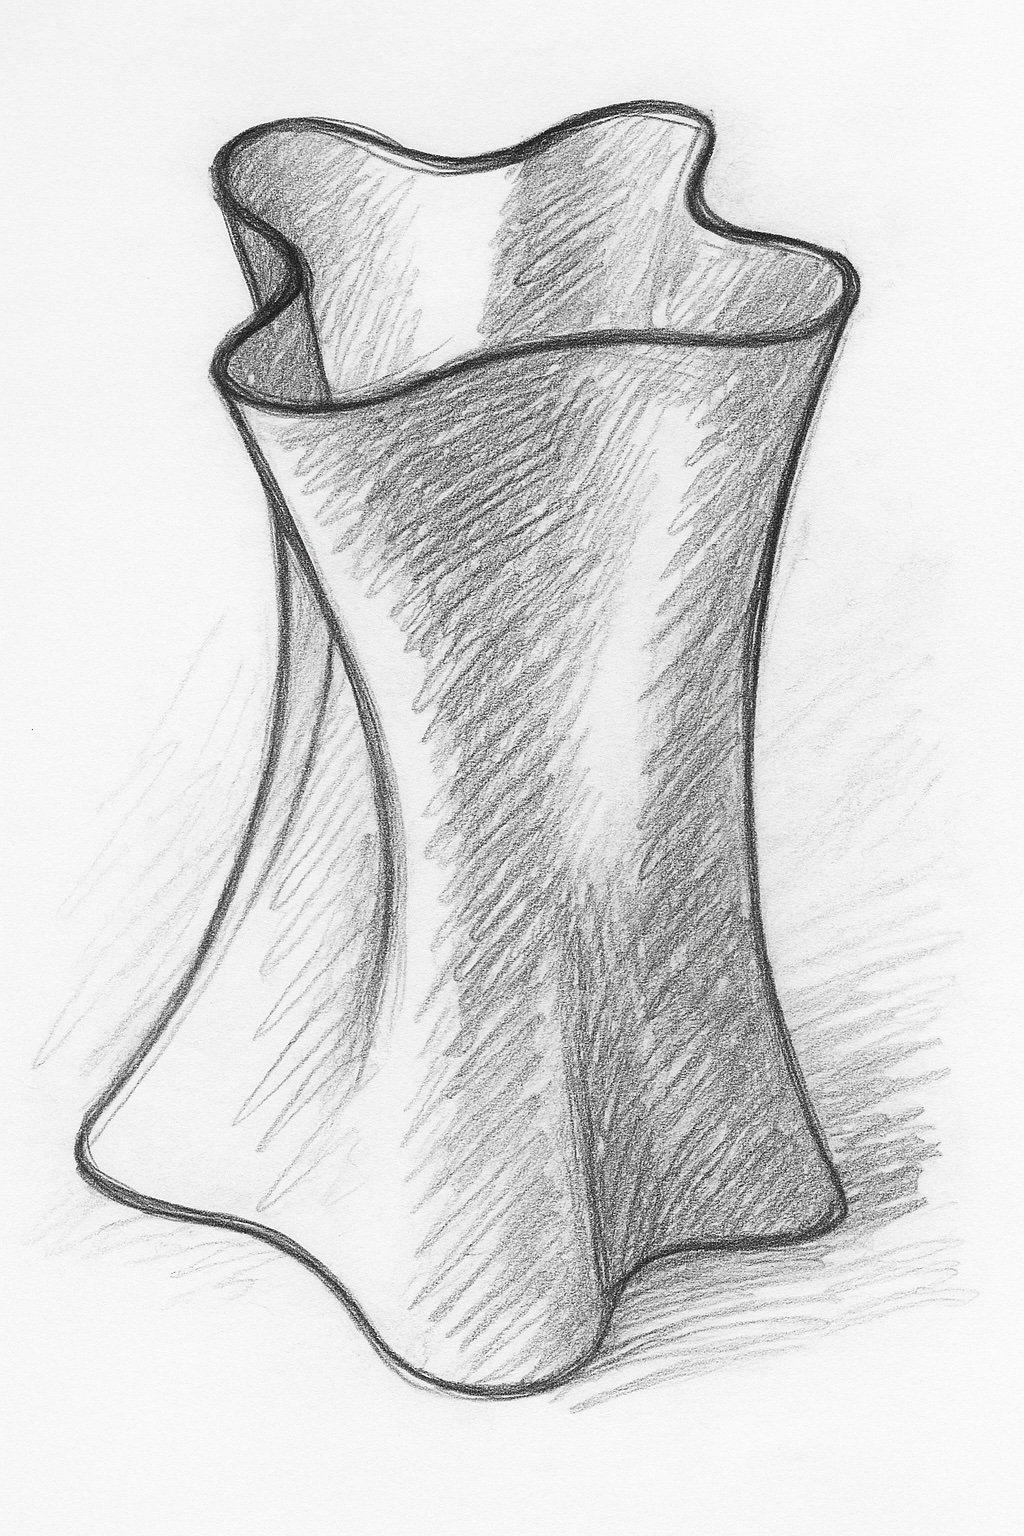
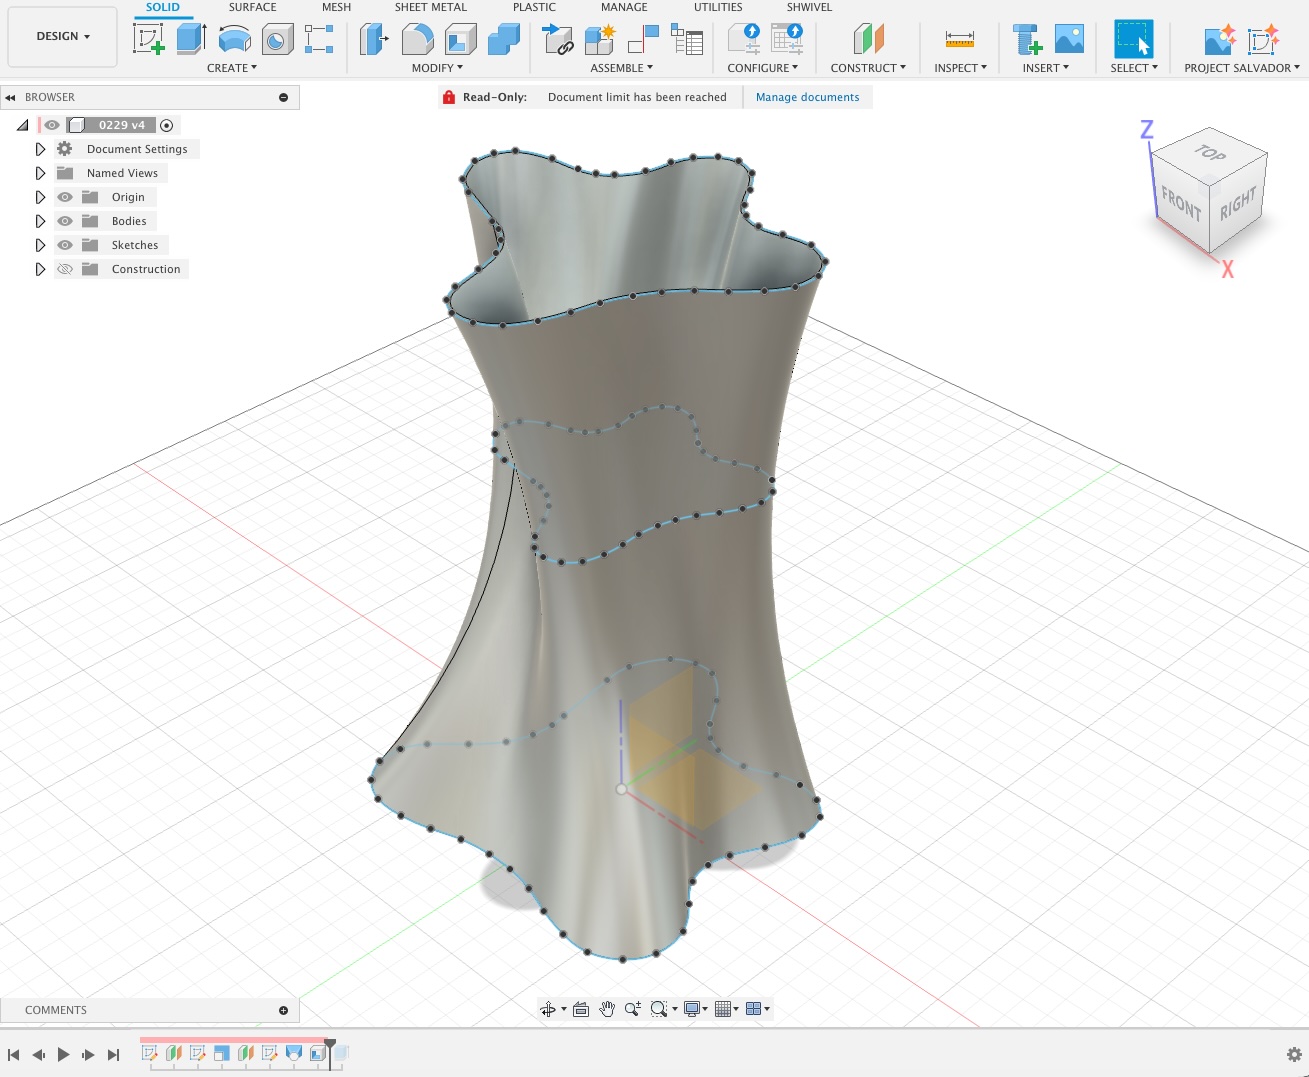
The sketch becomes geometry. Fusion 360, spline profiles, parameters for each ring. Proportions are decided here — once the code runs, the form is fixed.
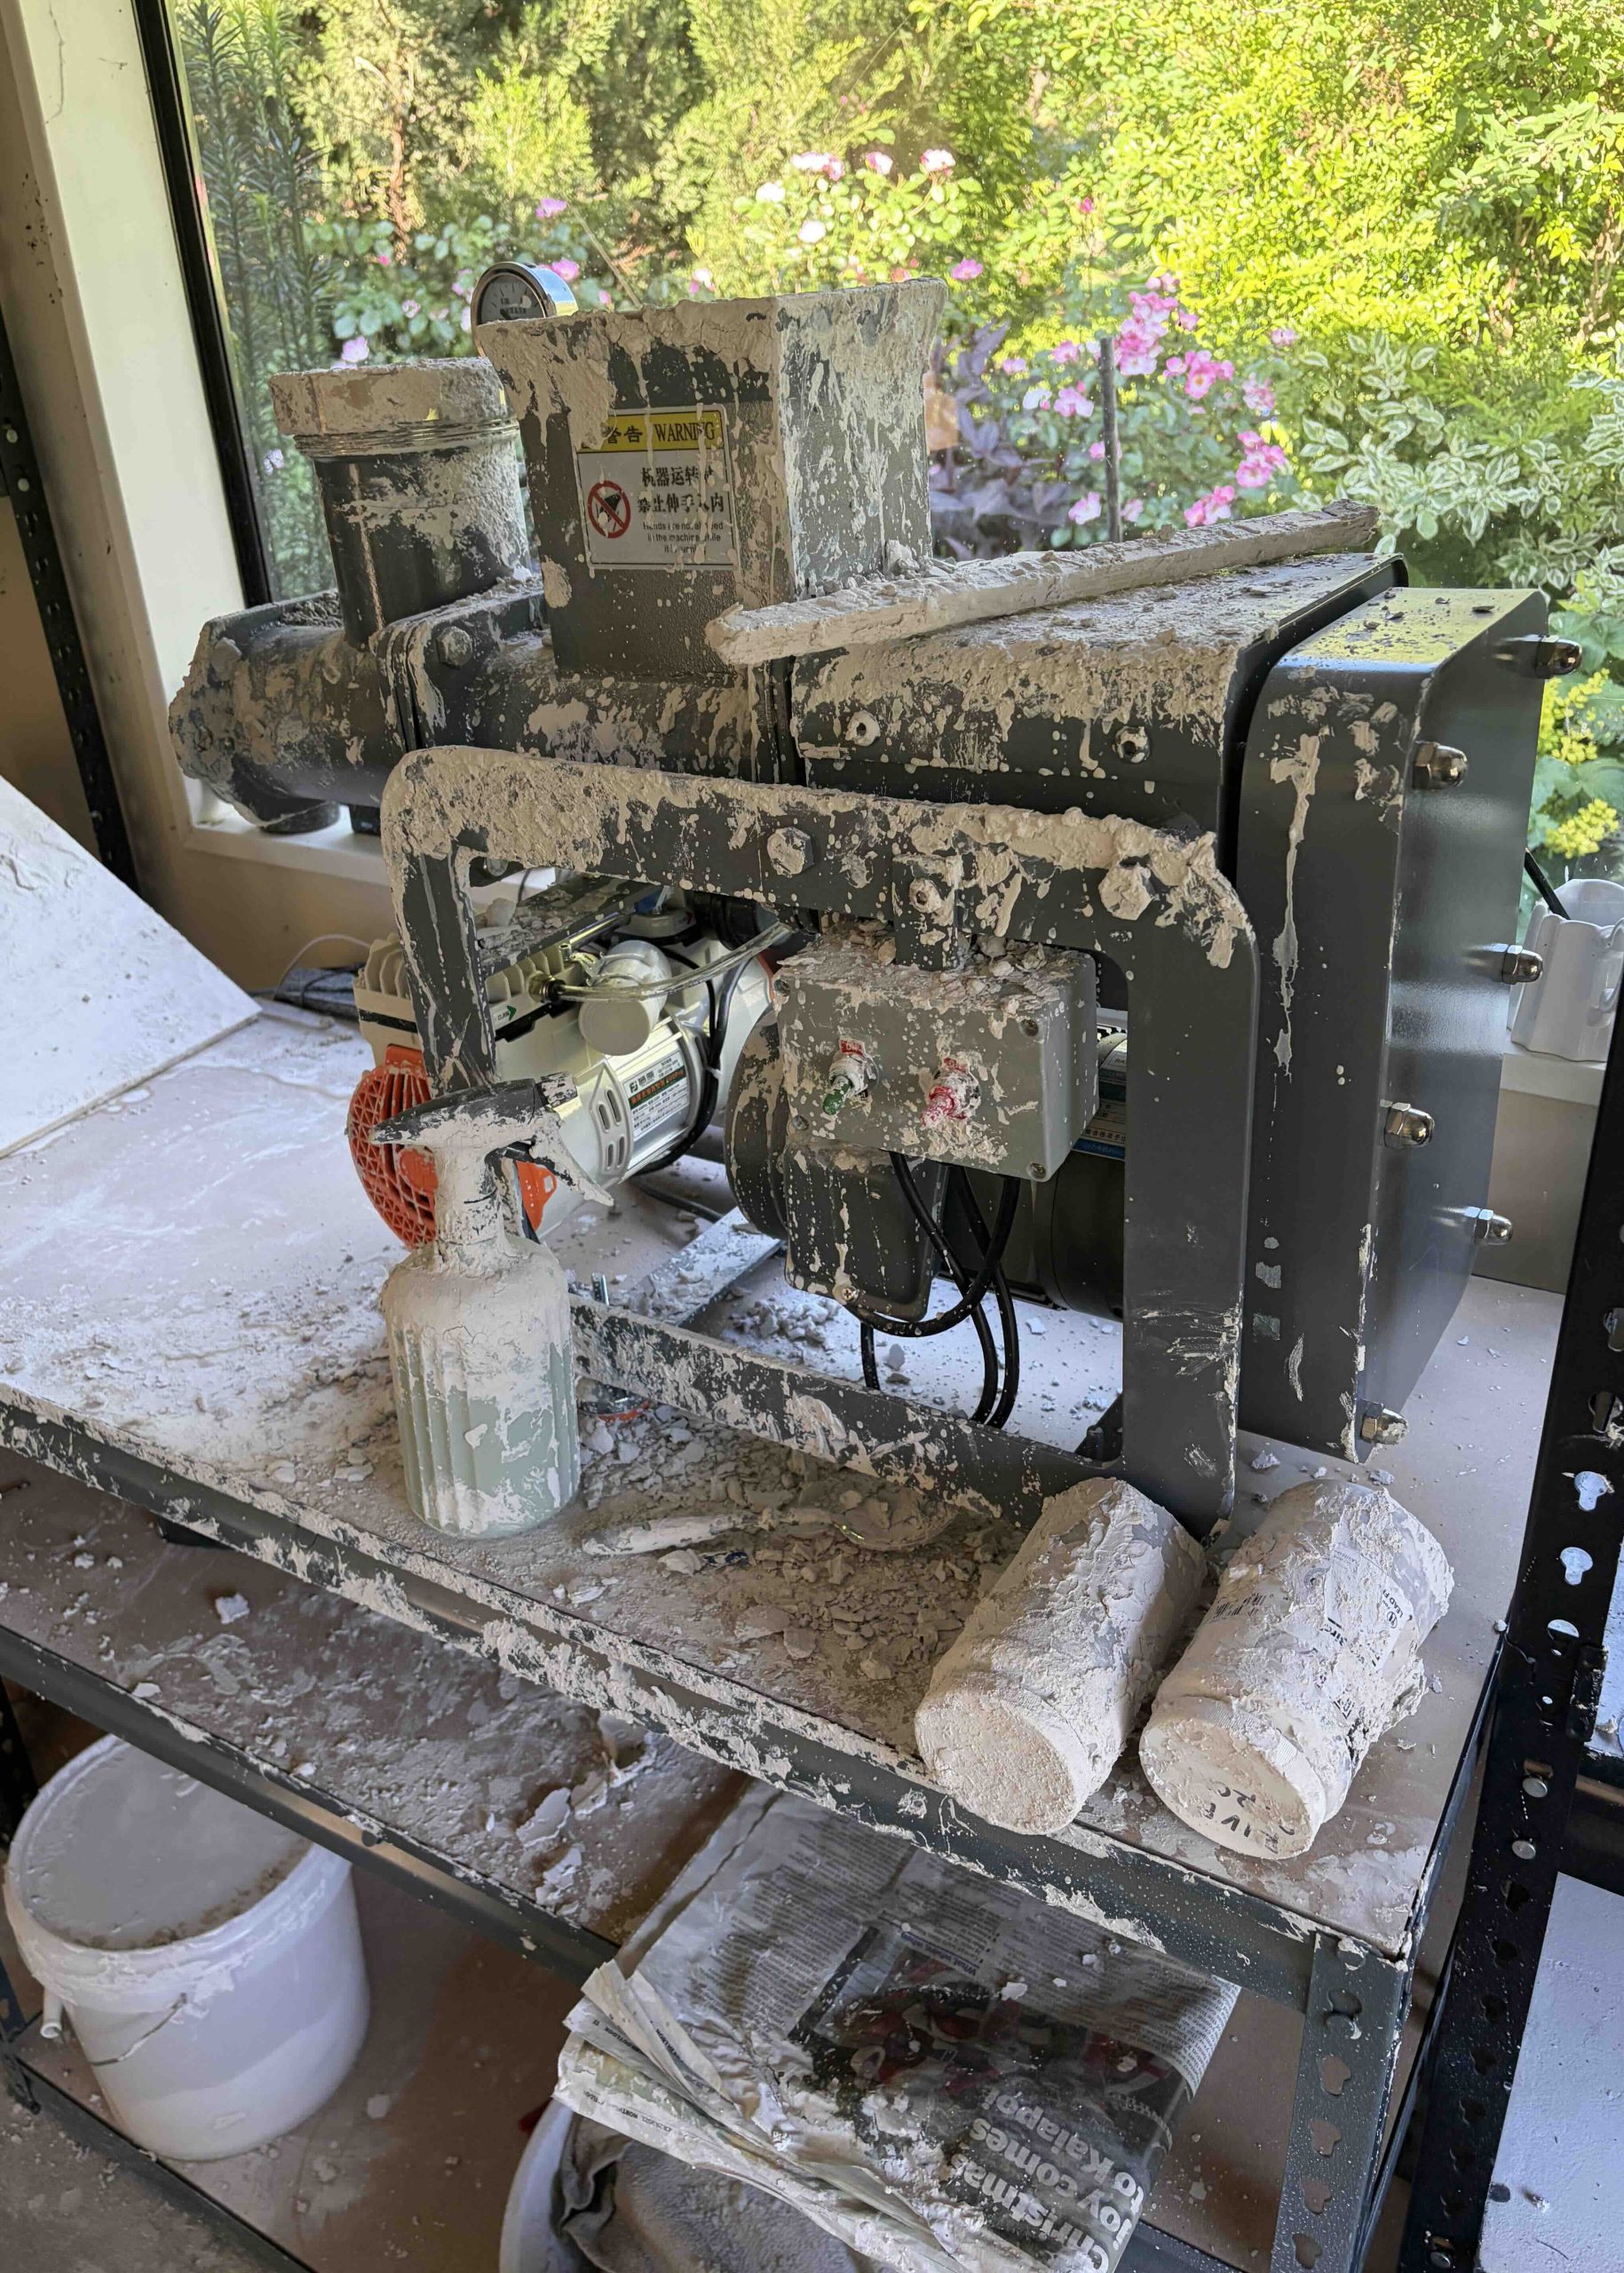
Porcelain, mostly. Occasionally stoneware or terracotta. The pugmill works it until there are no bubbles, no dry spots — a single mass at the right moisture. One bubble ruins a two-hour print.
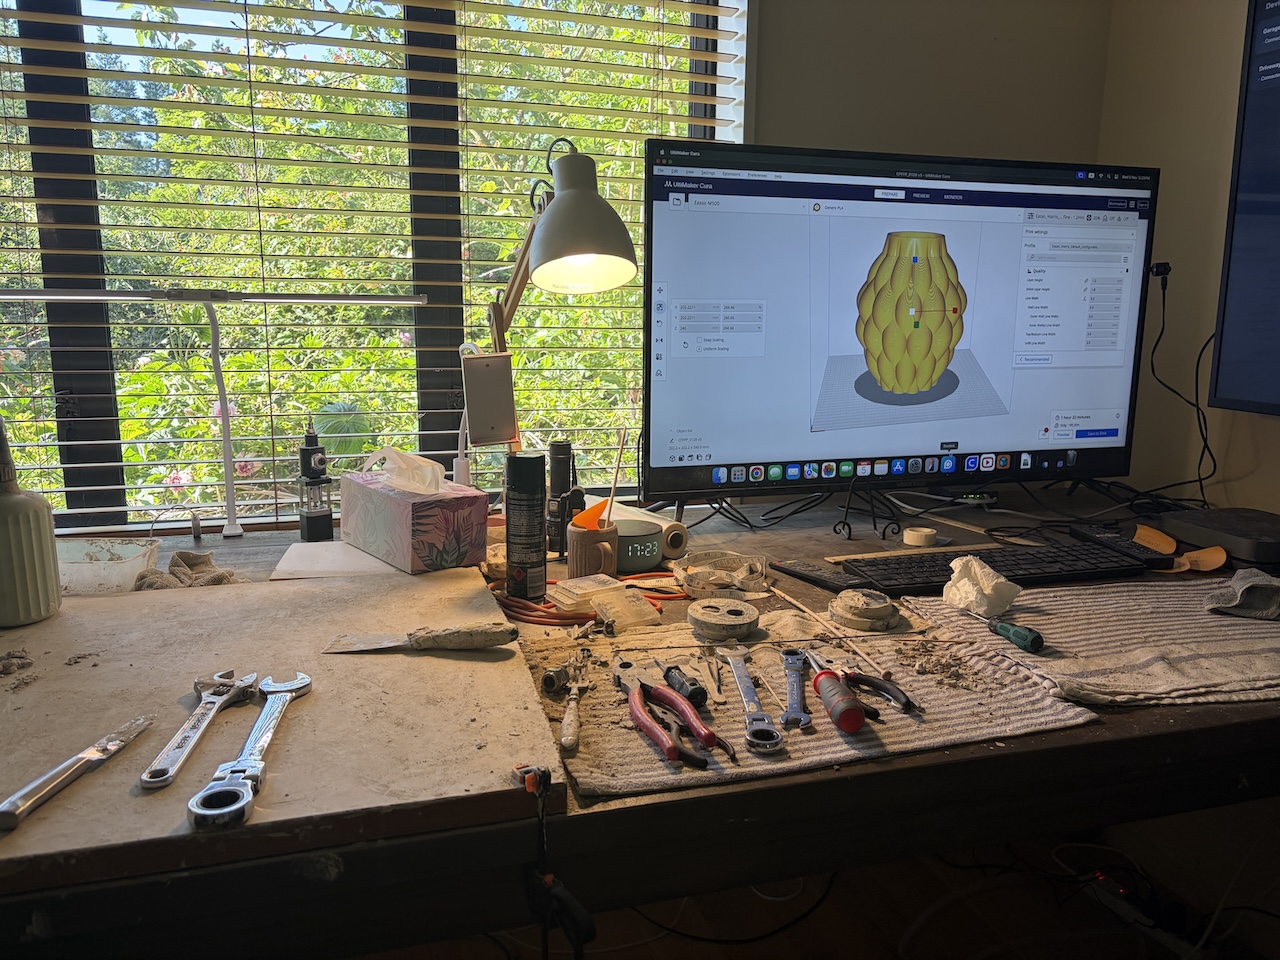
The model is sliced into layers. The printer will follow these lines, one by one, from bottom to top.

Clay goes into the cylinder. The nozzle extrudes a single ribbon, spiralling upward. A vase 24-30 cm tall takes about two hours. We watch, adjust, sometimes stop and start over.
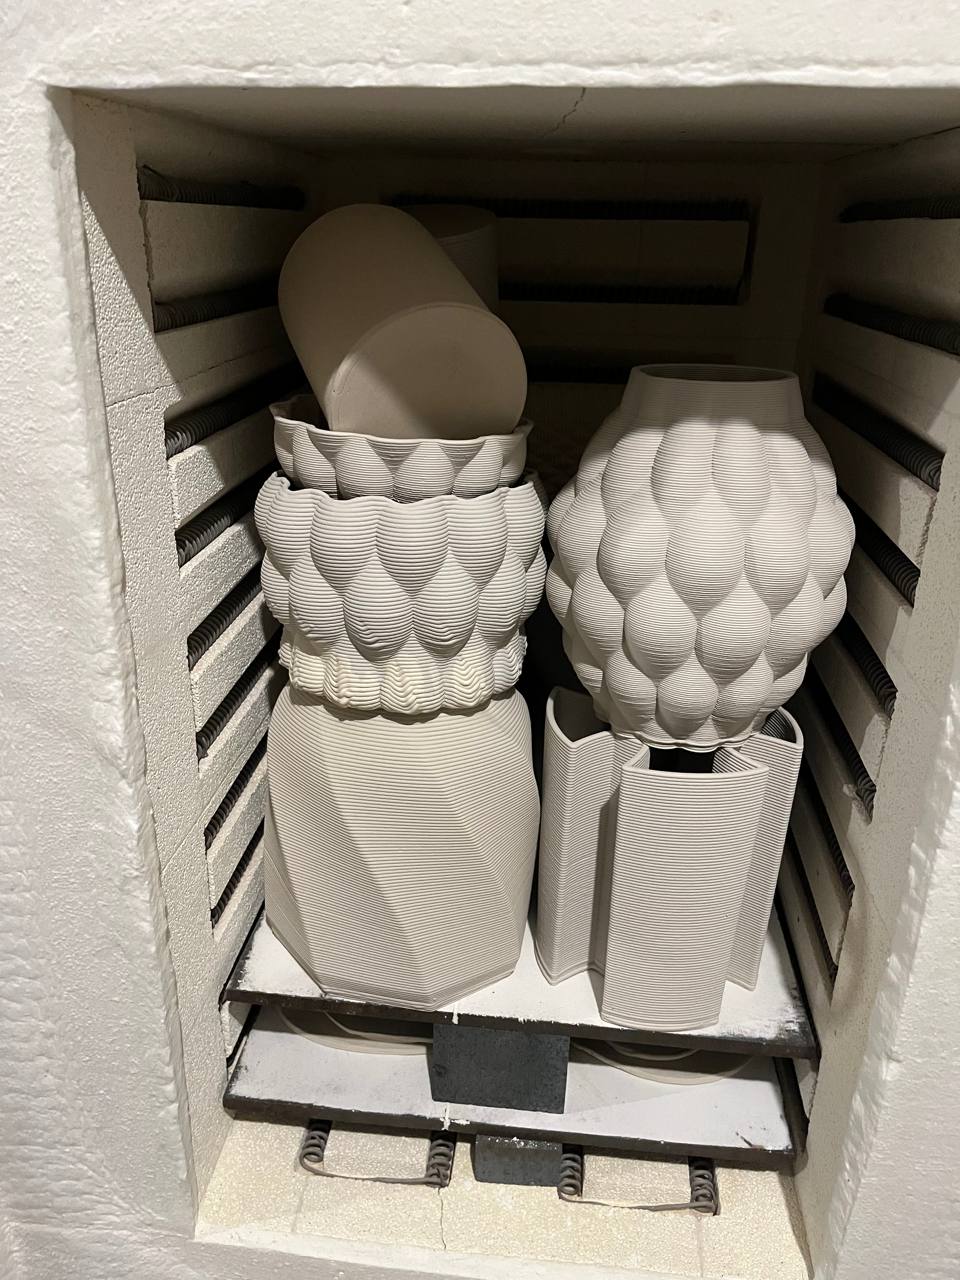
Several days of air-drying. Then the kiln - 900 C for the bisque firing. We don't open it until it drops below 100 C. By then the clay has become ceramic, permanently.
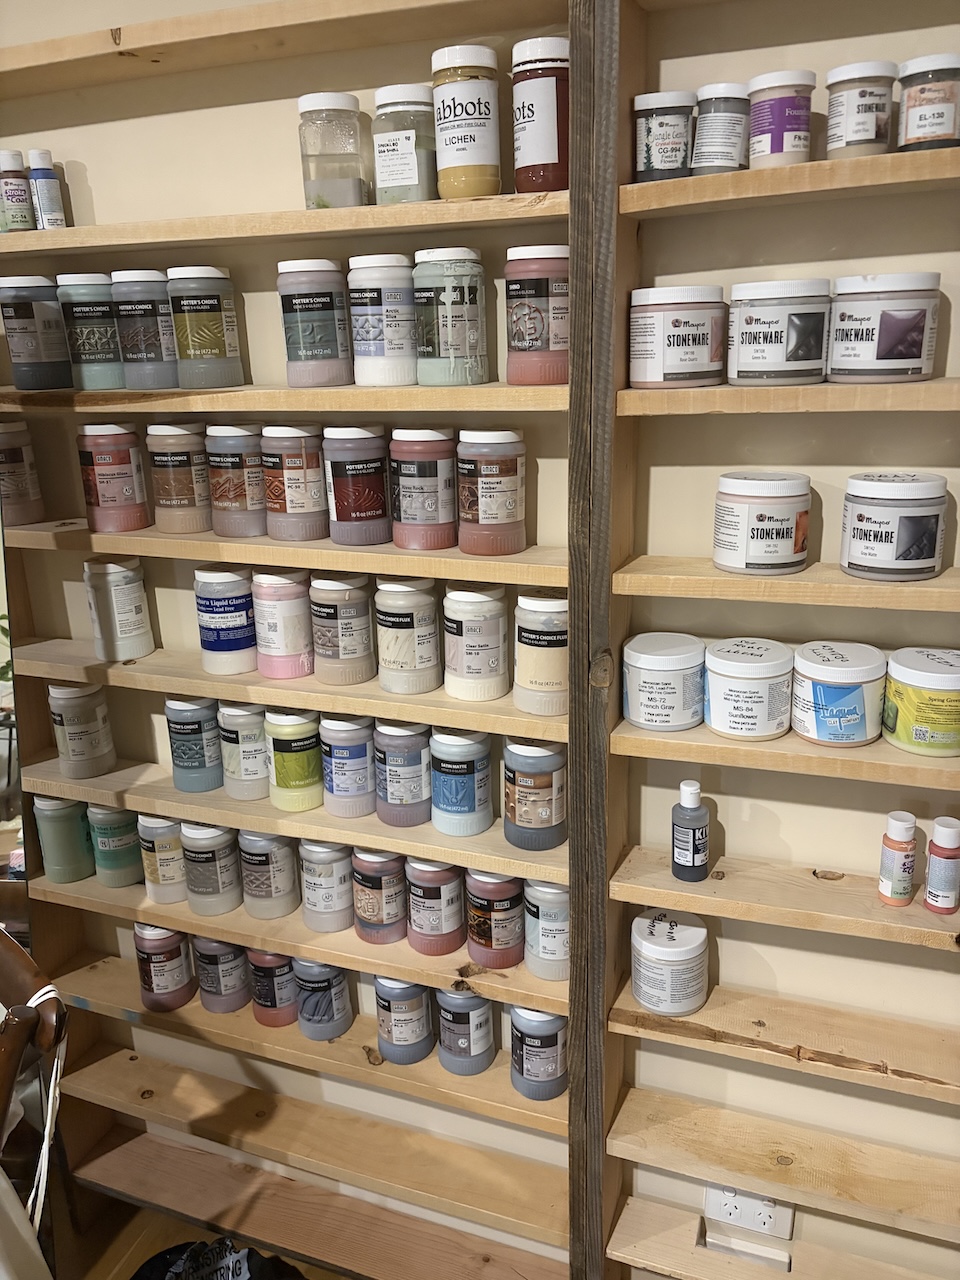
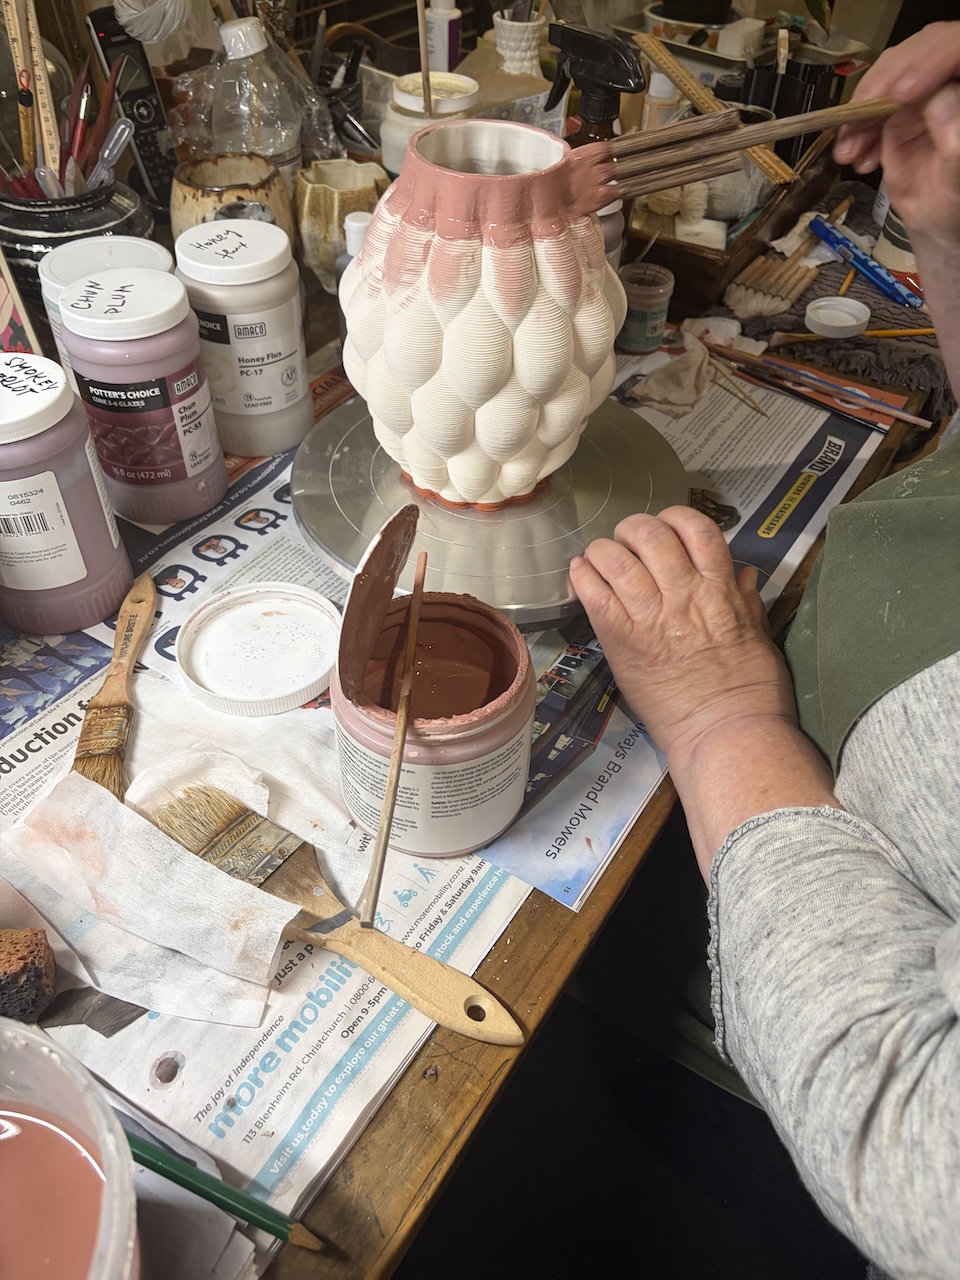
Each work has its own palette. Inside first - liquid glaze poured in, drained out. Outside by brush, by dip, by spray, sometimes through stencils. We try combinations. Some never work.
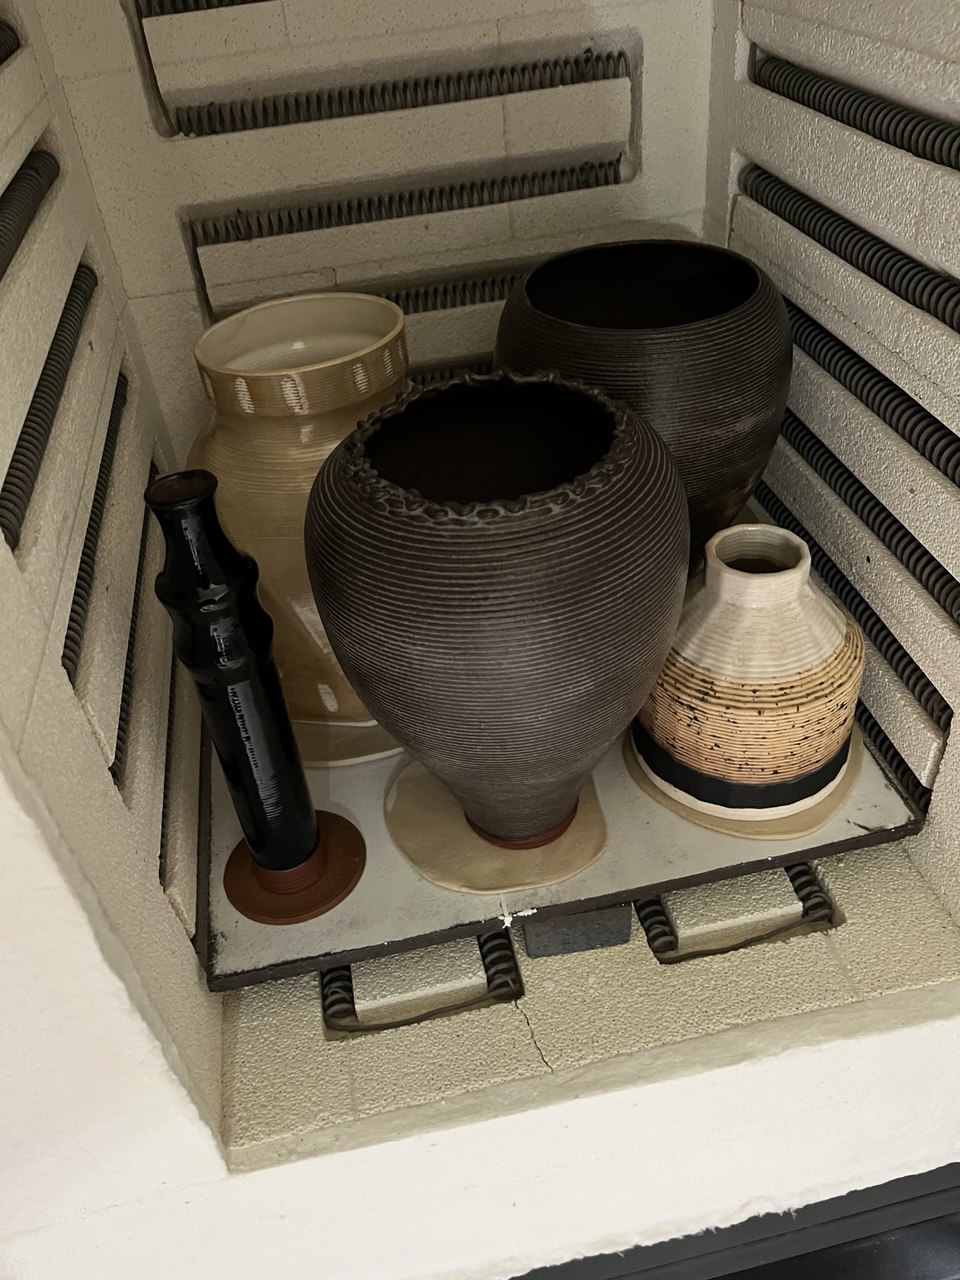
Second firing: 1200 C, cone 5-6. At this temperature glaze turns to glass. Again we wait. Again we don't open until 100 C.
What comes out of the kiln is no longer clay. The fire has the last word.
See the work